Aug 6, 2026
bag tag printing, golf bag tags, tournament printing, roster import, live tourney
Learn how to design, prep, and print golf bag tags that look pro. Covers sizes, bleed, variable data, finishing, and budgeting. Bag tag printing tips.

Friday morning in the pro shop always has the same nervous energy. The carts are staged, the sponsor signs are up, and someone's finally asking where the bag tags are, only to discover the variable data never merged and the blank stack is still sitting on the counter. That's the moment bag tag printing stops being a design task and becomes a workflow problem.
For golf events, tags sit right in the path of everything that has to work quickly. They affect cart assignments, sponsor visibility, and whether players know where to go when they walk in. If the tags are late or sloppy, the rest of check-in gets slower, and the whole morning feels less organized than it should.
The good news is that the fix is usually not a fancier layout. It's a better print process, cleaner roster data, and a finish that matches how the tags will be handled. If you can control those pieces, the artwork gets easier, the reprints get smaller, and the event stops depending on last-minute luck.
The Morning of an Outing When the Tags Aren't Ready
The worst bag-tag morning isn't loud. It's quiet, because everyone is trying to solve the same problem at once. A volunteer is sorting pairings, the shop staff are checking cart numbers, and the “finished” file turns out to be a static PDF with no player names merged in. The tags exist in theory, just not in a form anyone can hand out.
That's why experienced organizers treat bag tag printing as a dependency, not a decoration. A tag that has the player name, cart group, or sponsor line on it helps the first five minutes of check-in run smoothly, and those five minutes matter more than a perfect font choice. If the file isn't built around clean data, the event staff ends up doing manual edits when they should be moving people through the line.
Practical rule: if the roster export is messy, the print job will be messy. Design can't rescue bad data.
That idea isn't new in the broader history of bag tags. The modern tag grew out of travel documentation systems that started with passenger identification, not design flair, with baggage labels first supplied by steamship companies in the 1800s and later adopted by hotels, railroads, and airlines, while standardized baggage rules appeared in the 1929 Warsaw Convention (bag tag history). The point is simple. Bag tags were built to move people and bags through a process, not to sit on a table looking pretty.
If you're dealing with a rushed event and need outside help turning a turnaround problem into a print problem, T-Shirt Envy rush printing help is a useful example of how event merch teams handle fast deadlines without pretending the clock isn't real.
The organizers who stay calm on Friday mornings usually do one thing well. They plan backward from check-in, not forward from artwork. If you do that too, you'll know how to prep the roster, what stock to use, and which finishing step can't be skipped.
Picking the Right Tag Stock and Finish for Your Event
The stock decides whether the tag survives the day or turns into a liability by the back nine. For a one-off outing, laminated card stock is often enough if the tags are mostly for identification at check-in and immediate use. For leagues and recurring events, PVC or other plastic stock makes more sense because players are more likely to keep and reuse it.

Match the material to the way the tag lives
Heavyweight paper inside a clear sleeve works when you need flexibility and fast changes, especially if the player list shifts often. Laminated card stock gives you a cleaner, sturdier feel for a budget-friendly event, but it still behaves like a paper product if it sits in wet cart storage. PVC or plastic is the safer choice when the tag will be exposed to heat, moisture, and repeated handling across a season.
The practical size for golf bag tags is usually built around a compact vertical layout that can carry a name, event line, or sponsor mark without swinging like a signboard. A tag that's too large looks clumsy on a bag. A tag that's too small gets ignored in a cart barn.
What works: choose the finish based on how long the tag needs to live, not just how it looks on the proof.
For recurring league play, a plastic or PVC tag earns its keep because it can survive being moved from one week to the next. For a one-day charity outing, laminated card stock is often the better trade if the budget is tight and the tags don't need long-term durability. If you're planning cart signage or related event wayfinding, the same logic carries over to golf cart signs, because the substrate has to match how and where the piece is used.
The filter is simple. If players keep the tag after the round, spend for durability. If the tag's job ends at the check-in table, don't overbuild it.
Artwork Specs Most Organizers Get Wrong
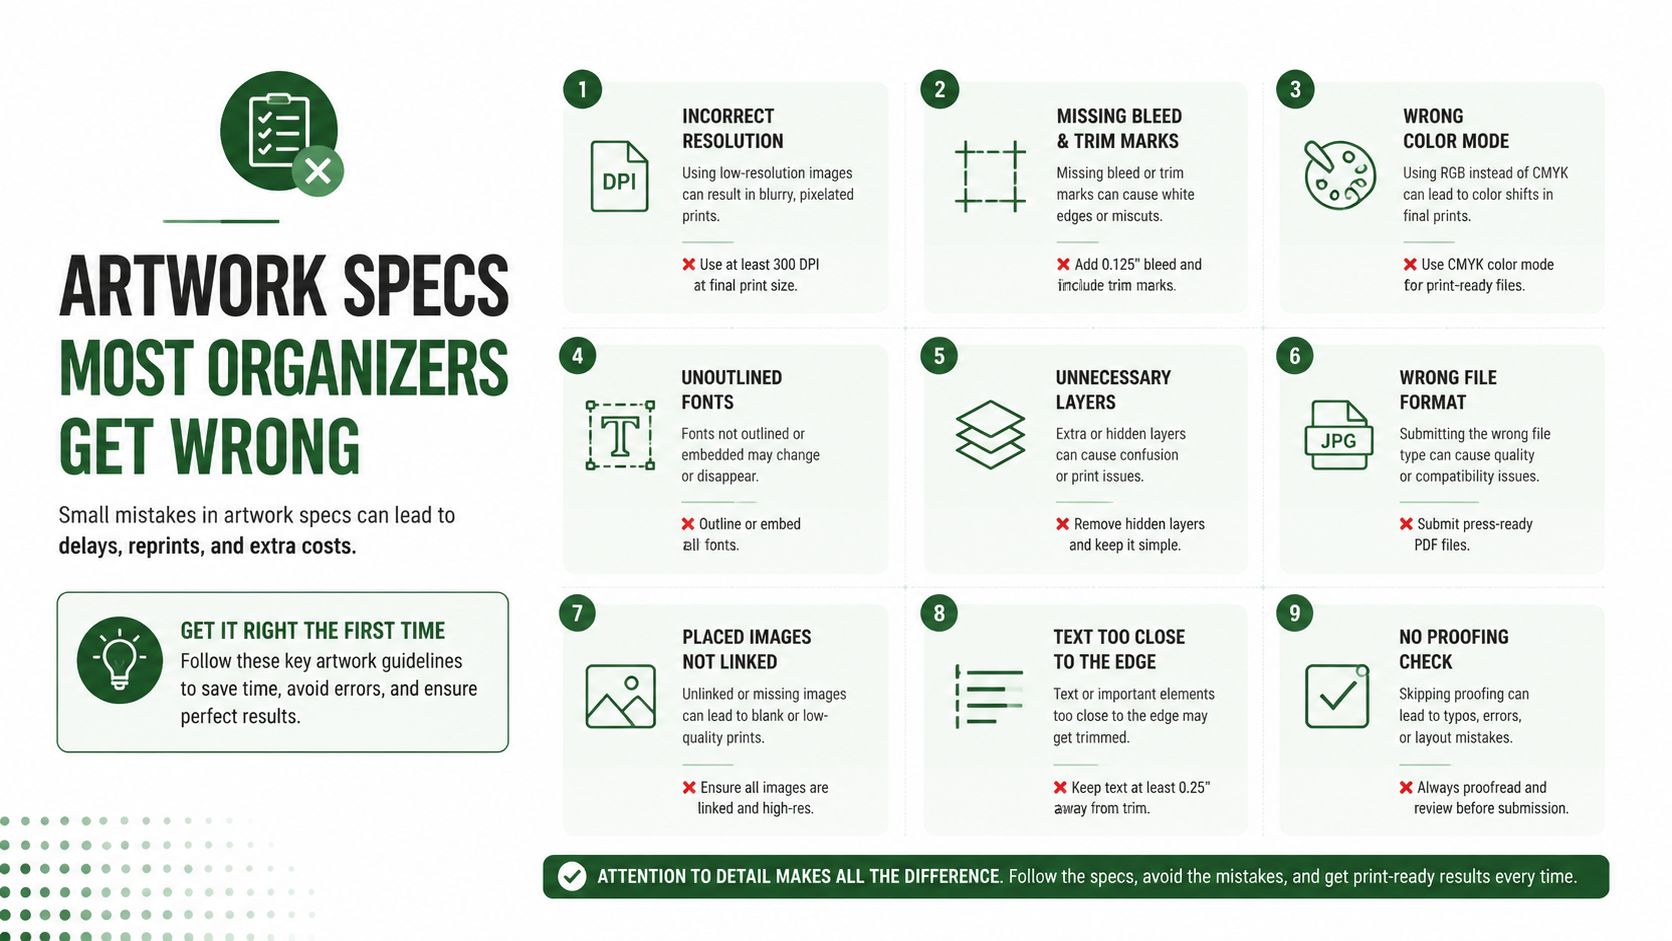
Most bad tags do not fail because the art is ugly. They fail because the file ignores the edges. Bleed, trim, and safe area sound like designer jargon until a name gets clipped or a white border shows up around the tag on event day.
Build the file so the printer doesn't have to guess
A safe layout keeps the critical text away from the cut line. Sponsor logos can sit closer to the edge than player names, but not so close that a slight shift makes the whole tag look off-center. In practice, a standard 0.125 inch bleed on each edge is the margin that keeps trim from exposing a sliver of white when the cut drifts, and that margin matters more on tags with heavy color blocks.
Typography matters just as much. For practical luggage-tag style readability, the guide in the brief recommends at least 8 to 12 pt sans-serif type and a scannable 2D code rather than raw contact data (tag printing guide). That is a good quality bar for golf tags too, because a name that cannot be read from a cart is just decoration. The same readability rules apply to golf course score cards, where type size, contrast, and spacing decide whether players can find the information fast. If the tag includes cart numbers or tee groups, make those elements larger than the sponsor copy.
Use the same thinking on the front and back. The front should do the quick job, which is identification. The back can carry sponsor messaging or a code, but only after the main name and event details have been protected inside the safe area.
A simple preflight works fast:
Check bleed: confirm color or artwork extends beyond the trim.
Protect the names: keep player data inside the safe zone.
Simplify fonts: use clean sans-serif type for anything a marshal needs to read quickly.
Review contrast: make sure names and cart numbers do not disappear against the background.
Confirm spacing: leave enough room so QR codes, sponsor marks, and player details do not crowd each other.
If that checklist feels basic, that is the point. Tags fail because a basic rule got skipped, not because the software lacked one more effect.
Getting Your Roster into the Print File
The quickest way to waste a good design is to type names into it one at a time. The cleaner route starts with the roster export, because the CSV is usually the part that saves the most time. The artwork may take ten minutes to polish, but the roster structure is what decides whether the print run takes one pass or three.
Start with the export, not the template
In Live Tourney, the practical flow is to export the player list as a CSV, clean the names, team labels, and any nickname fields, then map those columns into a printable template in Word, Illustrator, or a mail-merge tool. That keeps the design file stable and lets the data do the changing. It also makes it much easier to reprint only the tags that changed when pairings shift on the morning of the event.
The roster should be cleaned before the merge, not after. If one player is listed as “Mike,” another as “Michael,” and a third uses a team nickname, the printout will look inconsistent even if the layout is perfect. Decide which fields are official, then keep them that way. A print job looks professional when the names, team lines, and sponsor text all follow the same logic.
Workflow rule: one master template, one clean CSV, many reprints only when needed.
Field mapping should stay simple:
Player name goes in the main name field.
Team or flight belongs in a smaller secondary line.
Cart number or tee group should be large enough to read at a glance.
Sponsor line should stay separate from the player identity, not compete with it.
Previewing the merged output matters because spreadsheet formatting errors often show up only after the merge. Long names wrap, hidden spaces push lines off center, and blank cells create awkward gaps. Catch that on screen, not after the stack is already printed.
Keep a master file from event to event. That way the next tournament starts from a known-good template, not a half-fixed version somebody renamed at 11:47 p.m. If the event changes, update the CSV, not the design. That's the habit that makes bag tag printing feel routine instead of fragile.
In-House Printing Versus a Pro Print Shop
Both routes can produce solid golf bag tags. The right choice comes down to volume, deadline, and how much finish quality the event needs. A small member-guest and a 144-player corporate outing belong in different workflows.
Choose the shop or the desktop based on the real constraint
In-house printing works when the list is small, the team already has a decent printer, and someone can handle the merge without drama. A desktop inkjet or laser is usually enough for a 60-player member-guest if the tags are simple and the schedule is forgiving. The upside is control. If a name is wrong, you can fix it immediately, and if the roster export changes late, you can rerun the file without waiting on a vendor.
A pro print shop wins when the volume climbs, the deadline tightens, or the finish needs to hold up better through the event. That usually means more consistent color, cleaner edge work, and a better shot at getting the stock, lamination, and trimming right on the first pass. If you are comparing options for tougher surfaces and longer wear, durable UV printing solutions show the kind of finish a shop can deliver when the tags need to survive real handling. If you are also producing tournament logos or other branded materials for the same event, keep those files in the same system so the logo, tag, and signage all match. Our guide to tournament logo design covers how to keep that consistency across print pieces.
Factor | In-House Print | Pro Print Shop |
|---|---|---|
Volume | Better for smaller event runs | Better for large event runs |
Turnaround | Fast if the printer is ready | Fast if the job is prepped correctly |
Finish quality | Depends on your equipment and materials | More consistent on premium stock |
Late typo fixes | Easy if caught before printing | Easier if you can isolate the change early |
Lamination and sealing | Often manual | Usually cleaner and more repeatable |
The gray zone is where people lose time. If the job is medium-sized and the deadline is close, the decision often turns on who is managing the roster CSV and how many reprints you can tolerate if pairings shift or a sponsor line changes. Once you are reprinting after 11 p.m., the shop fee starts looking small next to the hours you save.
For tournament workflows, Live Tourney's report builder can also generate printed bag tags, which helps when the roster lives inside the same system as the rest of the event files. That is less about a flashy feature and more about keeping the data prep, print file, and final output in one place.
Finishing Touches That Make Tags Last
Finishing is where a decent tag starts to feel deliberate. Corner rounding cleans up the look. Hole punching or grommeting makes the attachment reliable. Lamination or sealing gives the tag a better shot against weather, cart bags, and the kind of handling that happens when people are in a hurry.
Do the steps in the right order
The most common finishing mistake is punching before laminating on laminated PVC. That can crack the material and ruin a clean batch in one move. Laminate or seal first, then punch, then attach the ring. If the printer or shop is using a precision half-cut or automatic cutter, check that the cut path doesn't weaken the spot where the attachment will sit.
Attachment choice matters too. A split-ring keyring holds up better than a cheap S-hook, which bends easily and can fail on day one. If the tag will move in and out of carts, bags, and storage bins all weekend, the hardware should match that abuse.
A practical finishing order looks like this:
Round the corners for a cleaner edge and less snagging.
Seal or laminate for weather resistance.
Punch or grommet after sealing, not before.
Attach the ring with hardware that won't deform under use.
Keep the attachment boring. Boring hardware is good hardware.
The final check is tactile as much as visual. Hold the tag by the ring, shake it once, and make sure the print surface doesn't flex, peel, or catch at the corners. If the edge lifts now, it'll lift faster once it's in a wet cart pocket.
The same logic applies whether the tag is for a one-day outing or a reusable league piece. Finish for the conditions, not for the photo.
Budgeting, Distribution, and a Final Pre-Flight Checklist
Tags are only useful when they land in the right hands at the right time. That's why budgeting and distribution belong in the same conversation. A clean print job that sits in a box until after check-in has the same practical value as a typo.
Keep the spend tied to the event type
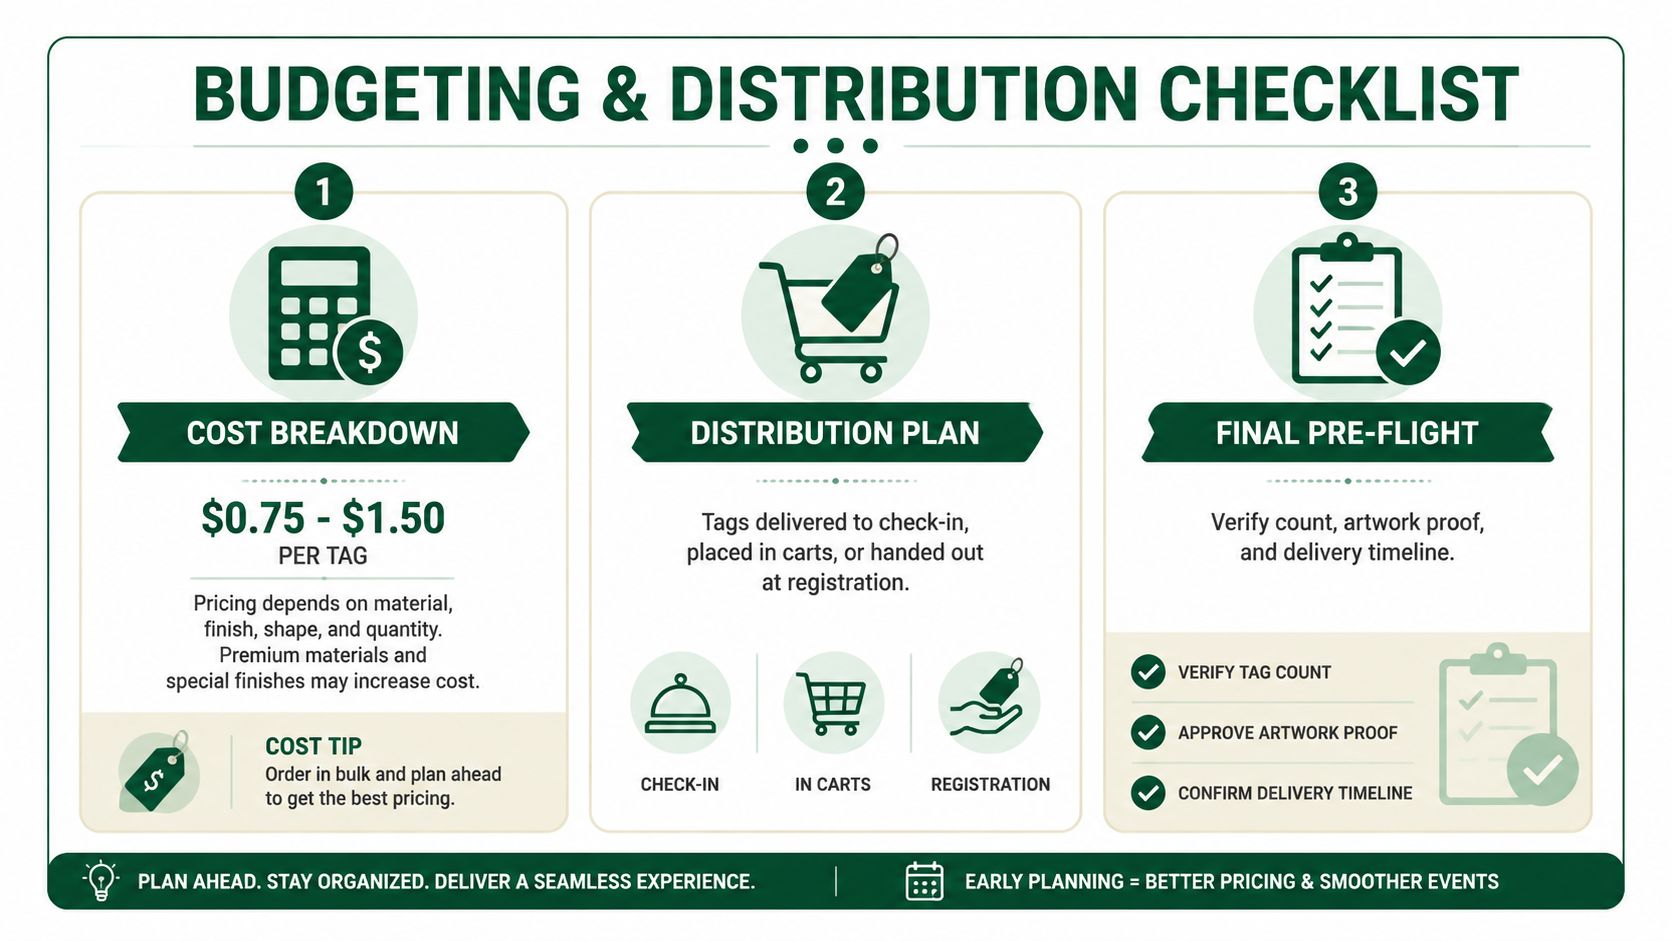
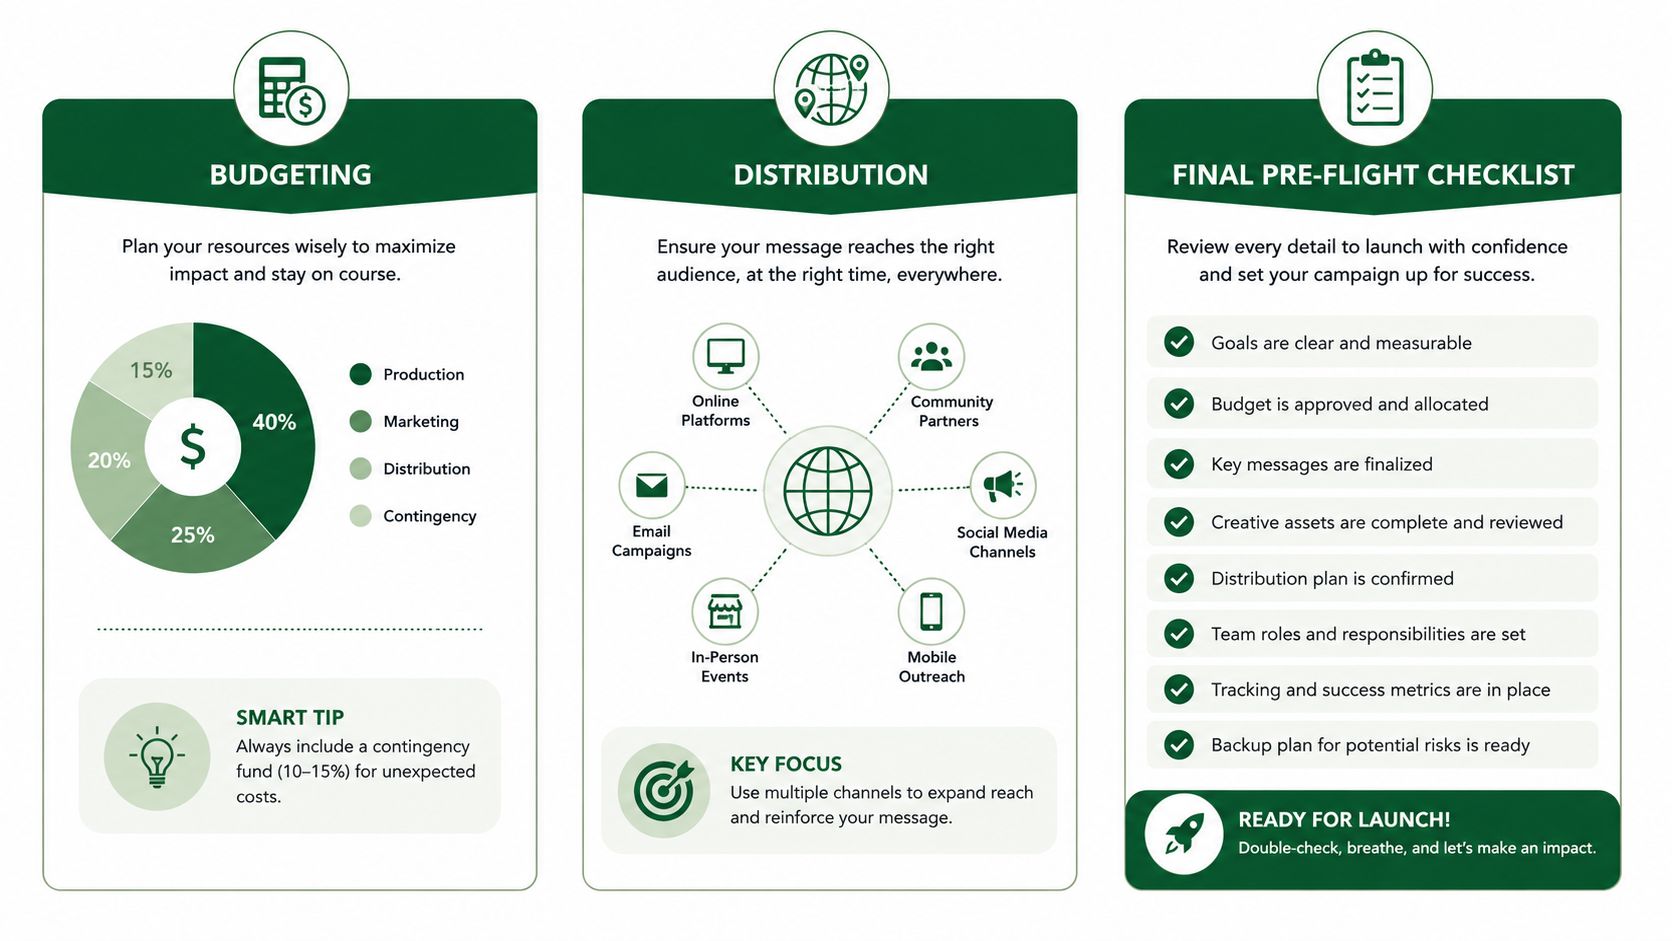
Budget falls along the same line as finish quality. Laminated card stock is the leaner choice for a one-off outing. Plastic or PVC costs more to produce, but it makes sense when the tag is meant to last through repeated use. The savings usually come from process, not sacrifice. Reuse the template, share bleed setup between events, and batch the order instead of rebuilding the file every time.
Distribution is the part many shops leave to chance. Group tags by cart, tee time, or registration row before the event opens. If you can stage them at the cart barn, you cut the amount of sorting that needs to happen at the check-in desk. Leftover tags should be kept with the master file so replacements don't turn into a scavenger hunt later.
For organizers who want the data and visuals to travel together, team event photo sharing is a useful model for how event assets and participant information can stay organized across a club workflow.
A pre-flight checklist keeps the morning from going sideways:
Count the tags: make sure the printed quantity matches the roster.
Proof the merge: scan every name, cart number, and sponsor line.
Check the finish: confirm the lamination, holes, and rings are secure.
Stage the handoff: decide where the tags will sit before players arrive.
Keep spares ready: hold a few extras for late adds, swaps, and corrections.
The cleanest systems are the ones that don't make the staff think too hard on event day. Live Tourney's bag tag customization tools fit that model because you can build the template once, keep the roster logic consistent, and reuse it every time the course runs an outing or league. That's the kind of setup that makes a Friday morning feel boring, and in this business, boring is a compliment.
If you want bag tag printing to stop being a Friday scramble, set up the roster flow, lock the template, and keep the finishing steps consistent from event to event. Live Tourney can help you build reusable golf event files, including bag tags, so the next outing starts from a clean system instead of a last-minute patch job.